Wavlink AX3000 Setup | Outdoor Extender Setup
Setup or troubleshoot your WiFi Range extender using Wavlink Setup support. Reach out our professionals for instant solutions. On this Wavlink AX3000 installation setup page, you will learn to configure and troubleshoot all issues related to Wavelink AX3000.
Introduction to Wavlink AX3000
Supporting Wi-Fi 6—also known as 802.11ax—the AX3000 Wi-Fi extender is a dual-band wireless range extender. Especially in bigger houses and wider outdoor areas, it is meant to increase the range and speed of your current WiFi network.
Why AX3000? The name refers to the combined speed—around 3000 Mbps. On the 2.4GHz frequency, it provides 574 Mbps; and on the 5GHz band, it’s 2402 Mbps. In simple terms, it’s fast. Fast enough for streaming, gaming, and smart home devices without lag.
Step-by-Step Outdoor AX3000 Extender Setup
Let’s walk through the setup without any tech jargon. Here’s how to get that thing up and running.
1. Choose the Right Location
The biggest mistake people make? Placing the extender at the very edge of their Wi-Fi coverage. Don’t do that.
Instead:
- Place it midway between your router and the area where you need coverage.
- For outdoors, this usually means a wall-facing backyard or a window that opens up to the patio.
- Make sure the spot is covered and weatherproof, or get a waterproof box if needed.
Pro Tip: If your extender has signal strength lights, use them to find the sweet spot. Green = good. Red = move closer to the router.
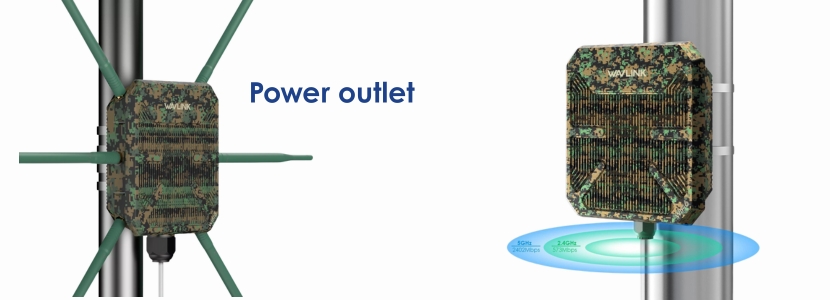
2. Power It On
Plug the extender into a power outlet. Wait for the power light to turn solid. This usually takes a minute.
If you’ve got an outdoor-rated version, make sure it’s mounted properly—no dangling cables, and keep it protected from rain and sun.
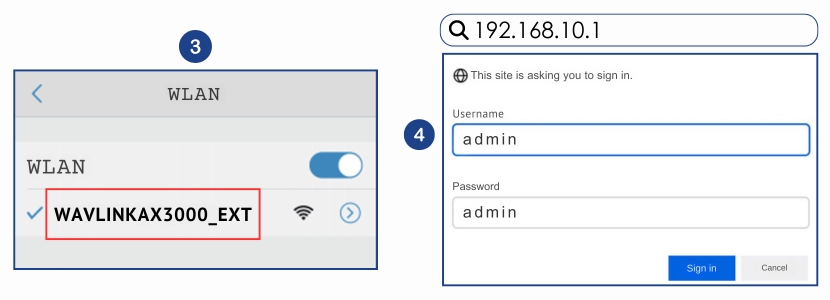
3. Connect to the Extender
Now grab your phone or laptop and check your Wi-Fi networks. You should see something like: AX3000_EXT. Connect to it. No password yet—it’s an open network just for the Vavlink AX3000 installation setup process.
4. Launch the Setup Page
Open a browser and type:192.168.10.1. This will take you to the extender’s configuration page. If it asks for a username and password, the default is usually:
- Username: admin
- Password: admin
5. Follow the Setup Wizard
Now just follow the steps on the screen. Usually, it’ll scan for nearby networks. Pick your existing Wi-Fi, enter your Wi-Fi password, and name the extended network (or just keep it the same name for seamless roaming).
Some extenders let you use the same SSID (network name) as your main network. That’s fine. Just be aware that devices might hang on to the weaker signal longer.
6. Test the Signal Strength
Once it’s all connected, test it out. Walk to the far end of your backyard, garage, or wherever you had a signal problem before. Try streaming a video or running a speed test. If it works without buffering, you’re good.
Still lagging? Move the extender a little closer to your router.
Troubleshooting Common Wavlink AX3000 Setup Issues
Here’s the reality: even simple setups can go sideways. If you run into trouble, use following steps to get your device running.
Can’t access setup page? Try connecting via Ethernet to your laptop if Wi-Fi isn’t stable. Or reset the extender and start fresh.
- Wrong password errors? Double-check you’re entering your router’s Wi-Fi password, not the extender’s.
- Extender keeps disconnecting? It may be too far from the router. Bring it closer.
- Slow speeds? Stick to the 5GHz band when possible—it’s faster, though the range is shorter. 2.4GHz is more stable at longer distances.
- Wavlink AX3000 not working? Reset your extender with the help of a pin or pen, pressing the reset pinhole button on the device.
Absolutely. If you’ve ever walked outside and watched your Wi-Fi drop to one bar—or vanish completely—this is the fix. Setting up the Outdoor AX3000 extender isn’t rocket science, and once it’s done, it feels like unlocking a new level of freedom. Music on the deck? Check. Streaming movies in a hammock? Yep. Smart security cams that don’t lag? Finally.
Just remember:
- Location matters more than you think.
- Setup takes 10–15 minutes, tops.
- Once it’s up, you’ll wonder why you waited this long.
If you’ve been living with spotty backyard Wi-Fi, don’t settle. Get it fixed from us. You deserve better internet—everywhere. Explore Wavlink Setup Support to get the best performance from your Wavlink AX3000.
FAQs
- Choose the spot for the range extender halfway between your router and the area with poor coverage.
- Avoid places near thick walls, microwaves, or metal objects in your house.